Clarinet Assembly
Assembling your clarinet; not something that most players would think twice about. At the first lesson, the teacher talks you through the different parts that make up the clarinet, how these five joints in front of you fit together. From this day onwards that’s it, you know which joint goes where, and with the many other things to contemplate, why would it even cross your mind to re-evaluate how you are holding the instrument.
An intricate assortment of key-work, pads, corks and wood make up the clarinet. Depending on the key-work, a little pressure in the wrong area can deregulate and mis-align the instrument quite quickly. With linkage key-work across the middle joint it is important that all players, from those on their first day all the way up to professionals, are aware of where and how they are holding the instrument.
New students regularly come in looking for their first instrument, whether that be renting or purchasing. Amazed by the clarinet and excited to begin their playing journey, we talk them through how to piece the clarinet together. Though this is great to get them started, with all the other things to think about, the intricacies can easily be forgotten. Many players aren’t warned or guided through which areas of the clarinet to avoid; identifying what can deregulate or damage the instrument.
There are two specific issues which most commonly occur from mishandling, though easily repaired, it is better to be aware and prevent them from happening. The first issue occurs from bending the right-hand little finger keys, causing the crows foot to sit incorrectly and the lower pads to not seal. The second, from knocking the top joint and bottom joint parts of the middle linkage together when connecting these joints, either bending the parts or scraping off the cork that cushions them.
How-to guide
Detailed below is an explanation on how to put the instrument together, areas to be aware of and images to show this.
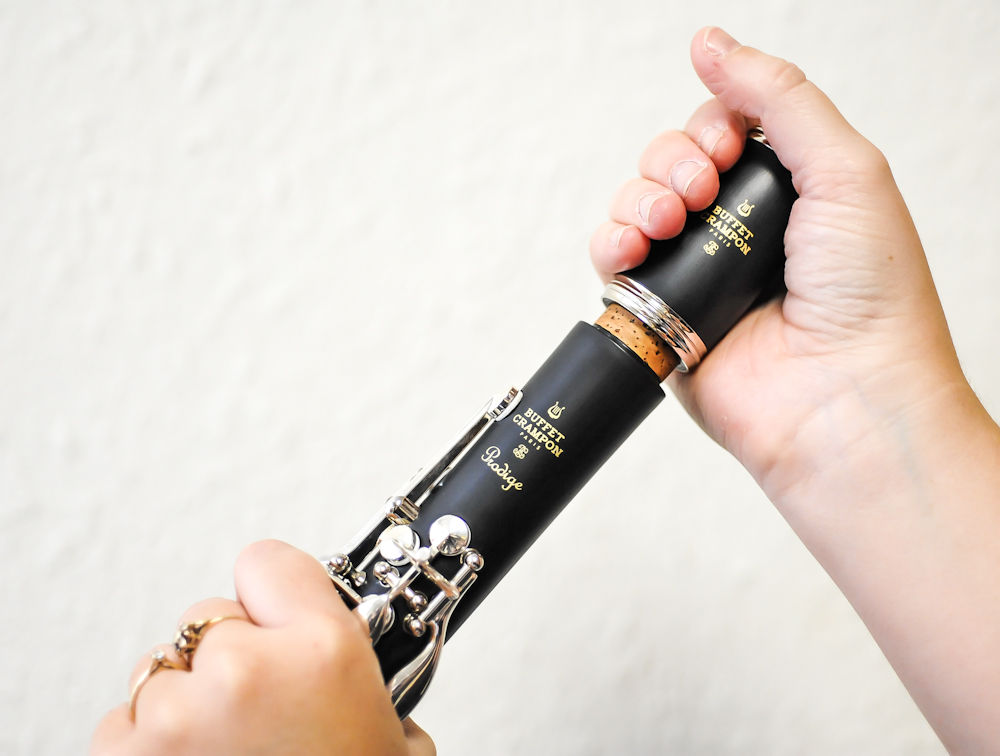
Fig.1 Connecting the barrel and top joint
When placing together the barrel and top joint it is important to be aware of where the trill keys are. As these stretch below the end of the top joint they are easy to bend if lent against yourself or something. Ensure the cork has a good amount of grease on it so that there is no need to use force, then twist the barrel onto the joint.
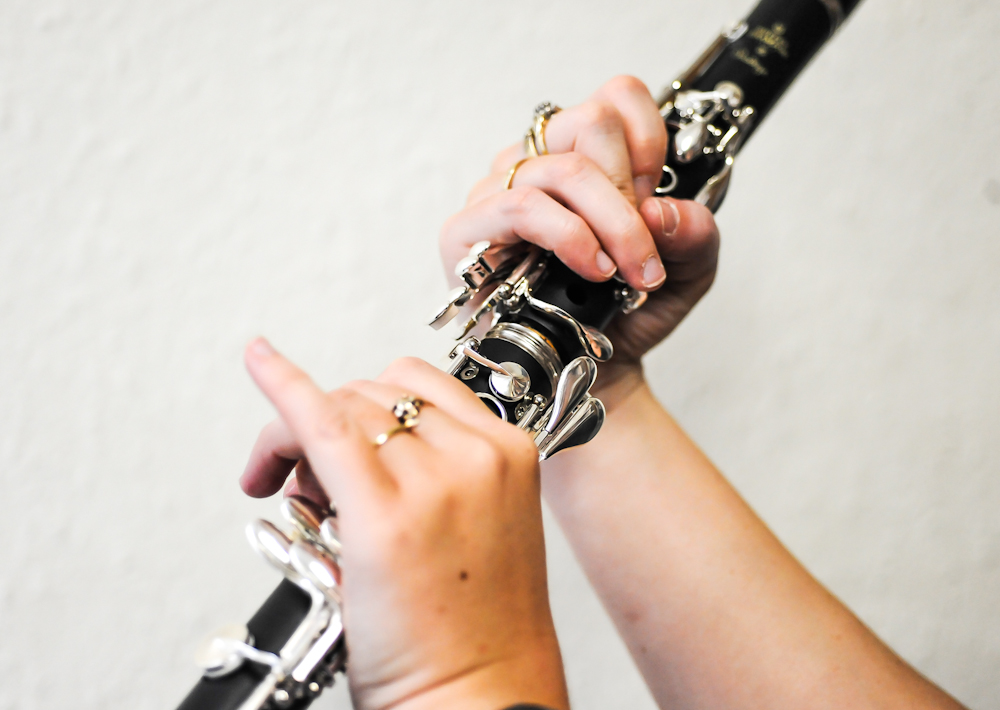
Fig.2 Connecting the top joint and bottom joint
Joining together the top and bottom joint is the most troublesome, with several things to be aware of. It is important to hold down the second ring of the top joint to ensure the middle linkage is lifted and does not clash with the bottom joint linkage. For the bottom joint make sure to avoid the lower pads, right-hand little finger key-work and top of the left-hand levers. The strongest area of this joint is at the base of the left-hand levers, just above the right hand little finger keys (see fig. 3).

Fig.3 Positioning of the hand on lower joint
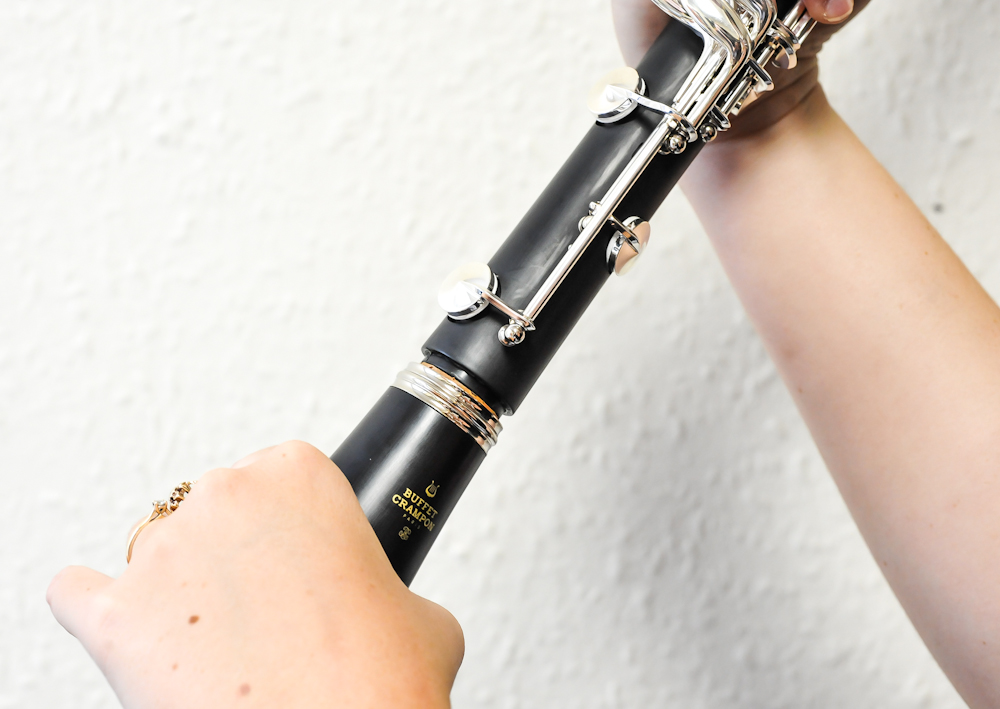
Fig.4 Connecting the bottom joint and bell
When connecting the bottom joint and bell you can face the same problem area of the bottom joint as above. Watch out for these and gently secure the bell on to the end of the bottom joint.
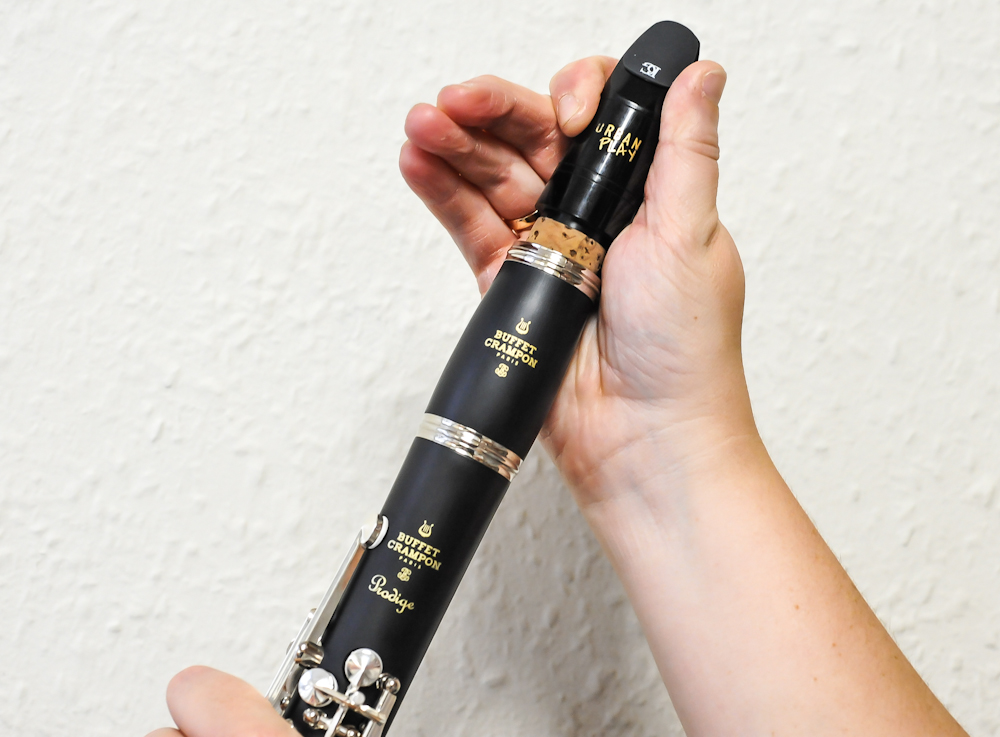
Fig.5 Connecting the mouthpiece
Ensure the mouthpiece is well aligned and set up ready to play.
Katie Lord, Clarinet Specialist – Howarth of London