Oboe Assembly
Before beginning to play the oboe, it is essential to learn how to assemble the instrument in a way that avoids damaging its mechanism. Oboes are very delicate instruments which are difficult and expensive to repair, so it is important to avoid putting excessive force on any keys that may bend, and to leave manipulating any screws to professionals, as incorrect adjustment can prevent an oboe from working.
Firstly, the oboe case should be placed on a flat, sturdy surface such as a table, so that it can be opened without the risk of dropping any part of the oboe. Most oboe cases have zips or latches. Instrument cases are usually designed to have a larger bottom and thinner lid; it is vital to ensure the case is the correct way up before opening it.
The oboe is made up of three sections: the top joint, the lower joint, and the bell. The cork-covered sections at the bottom of the top joint and lower joint are called tenons. These areas can often be stiff and make the instrument difficult to put together. This issue can be rectified using cork grease, which is put on the tenons to make them more slippery. Beginner oboists can often make the mistake of using too much cork grease. If cork grease can clearly be seen on the corks, wipe some of it off before it dries as an excess can cause an oboe to stick together.
How-to guide
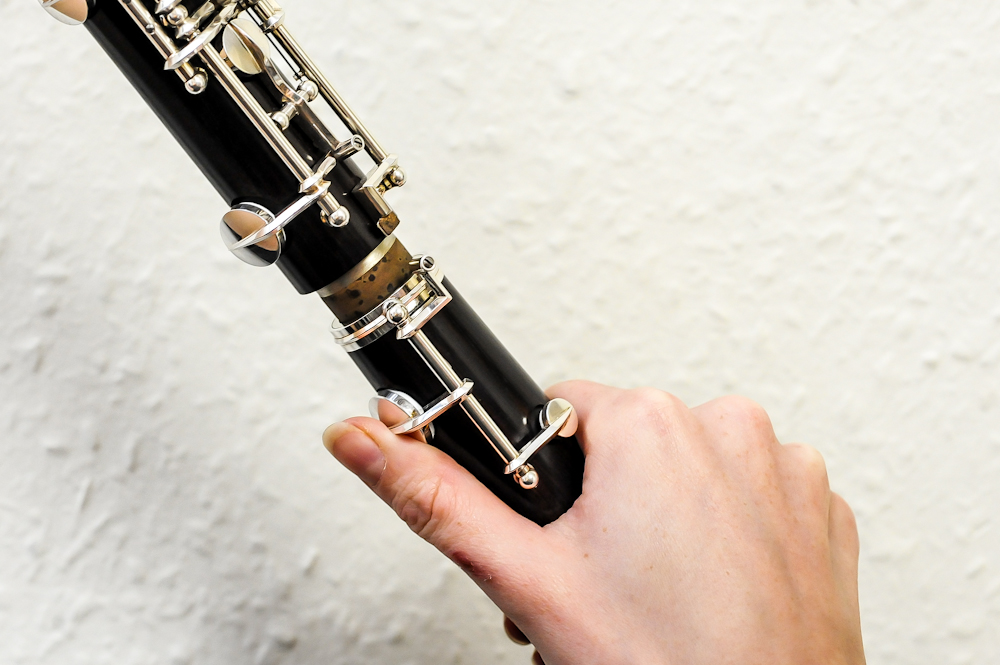
Fig.1 Connecting the bottom joint and bell
Begin by joining the oboe’s bell to the lower joint. If your oboe has a low Bb, it will have a large pad on the bell. Whilst holding this down, push the bell onto the tenon of the lower joint, and twist it until the pillars and large pads are aligned across the lower joint and bell. Only hold the lower joint below the bottom C, C#, and Eb keys, or between this set of keys and the feather keys (low B, Bb, and left Eb keys). This will minimise the risk of bending these delicate keys.
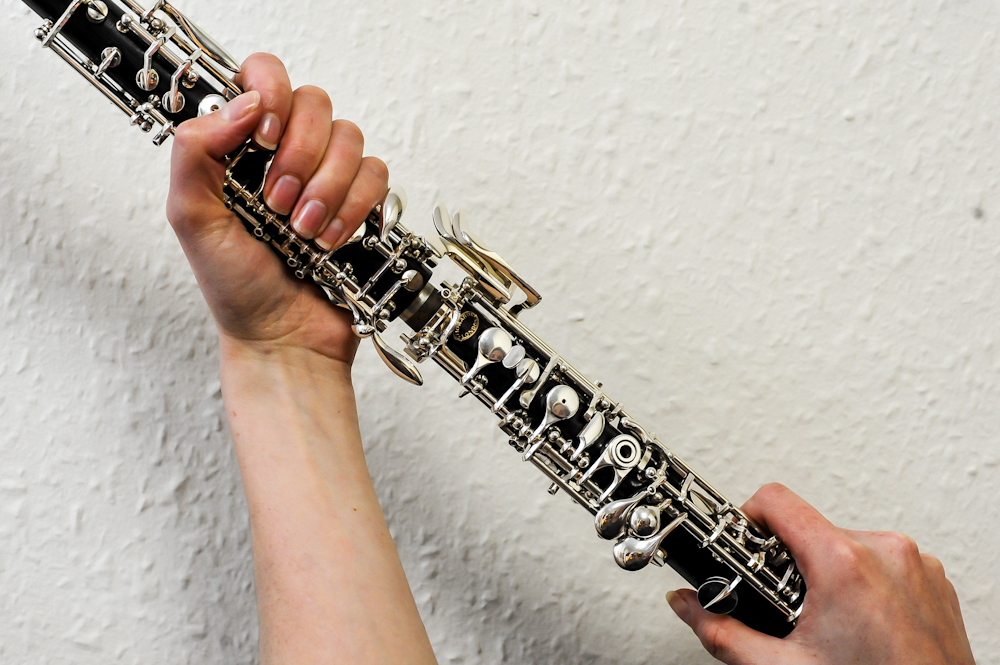
Fig.2 Connecting the top joint and bottom joint
Next, hold the oboe’s top joint around its middle, taking care to again avoid exerting force on the keys sticking out at the sides of the oboe’s main body, especially the second octave key. Align the upper and lower joints and gently push them together. If your oboe has two small ‘bridge keys’ at the bottom of the upper joint, take care not to bend these. The oboe is correctly assembled when these two keys match up with the corresponding keys at the top of the lower joint.
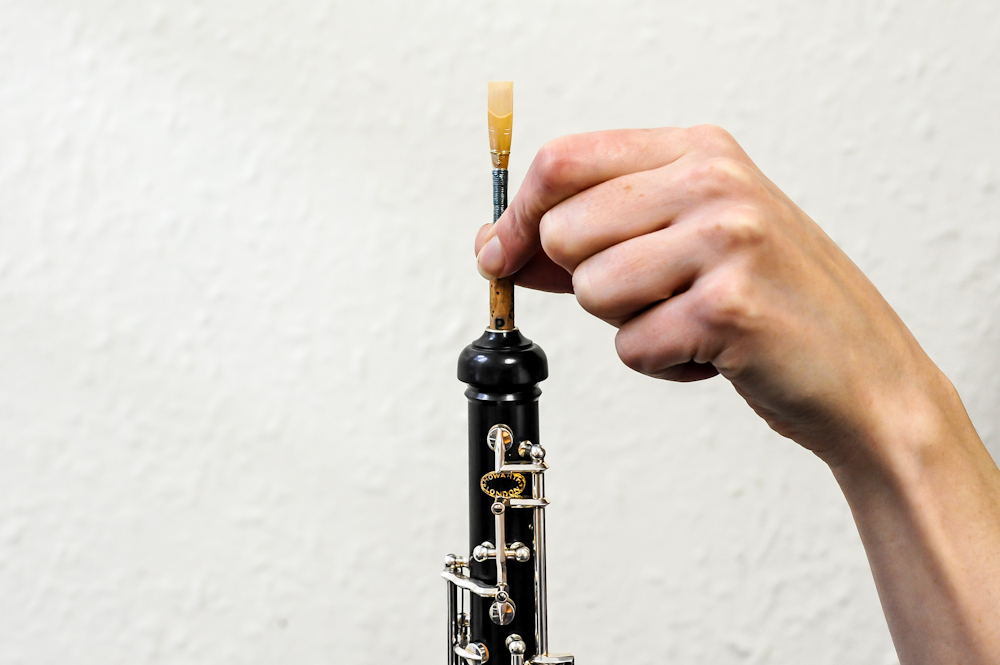
Fig.3 Connecting the reed and top joint
When all three joints have been put together, it is time to insert the oboe reed. After soaking the reed, cork grease can be applied to the reed’s staple to make it easier to insert into and remove from the oboe. Ensure the reed is straight (one blade facing the front of the oboe, the other facing the back) and gently push it into the oboe as far as it will go. Only touch the cork part of the oboe reed when removing it from the instrument, as the cane is very fragile and easy to break.
Bethany Craft, Oboe Specialist – Howarth of London