Oboe Reed Making Equipment
As the oboe is a double reed instrument with no mouthpiece or crook to affect its sound, suitable and good-quality reeds are essential for oboists to successfully play their instruments. Even slight differences in reeds can greatly vary the sound they produce, and so whilst many oboists are satisfied to buy pre-made reeds throughout their entire playing careers, others learn to make their own reeds so they can make them more suitable to their preferences.
Many oboists learn to make reeds under the supervision of their teachers or another accomplished reed maker, whilst others attend reed making classes which are sometimes run at events. For those looking for online resources to help them with the first steps of reed making, this guide details the initial equipment you will need to get started.
Adjusting Oboe Reeds
Before learning to make their own reeds from scratch, many oboists first learn to adjust shop-bought reeds. The Howarth Oboe Reed Adjusting Kit contains all of the necessary specialist equipment to adapt reeds to your own unique preferences. The kit includes Dr. Downing’s Oboist Reed Doctor, a manual which many oboists learning to adjust their reeds find invaluable, as it details and clearly explains the most common reed adjustments.
Beginning to Make Reeds
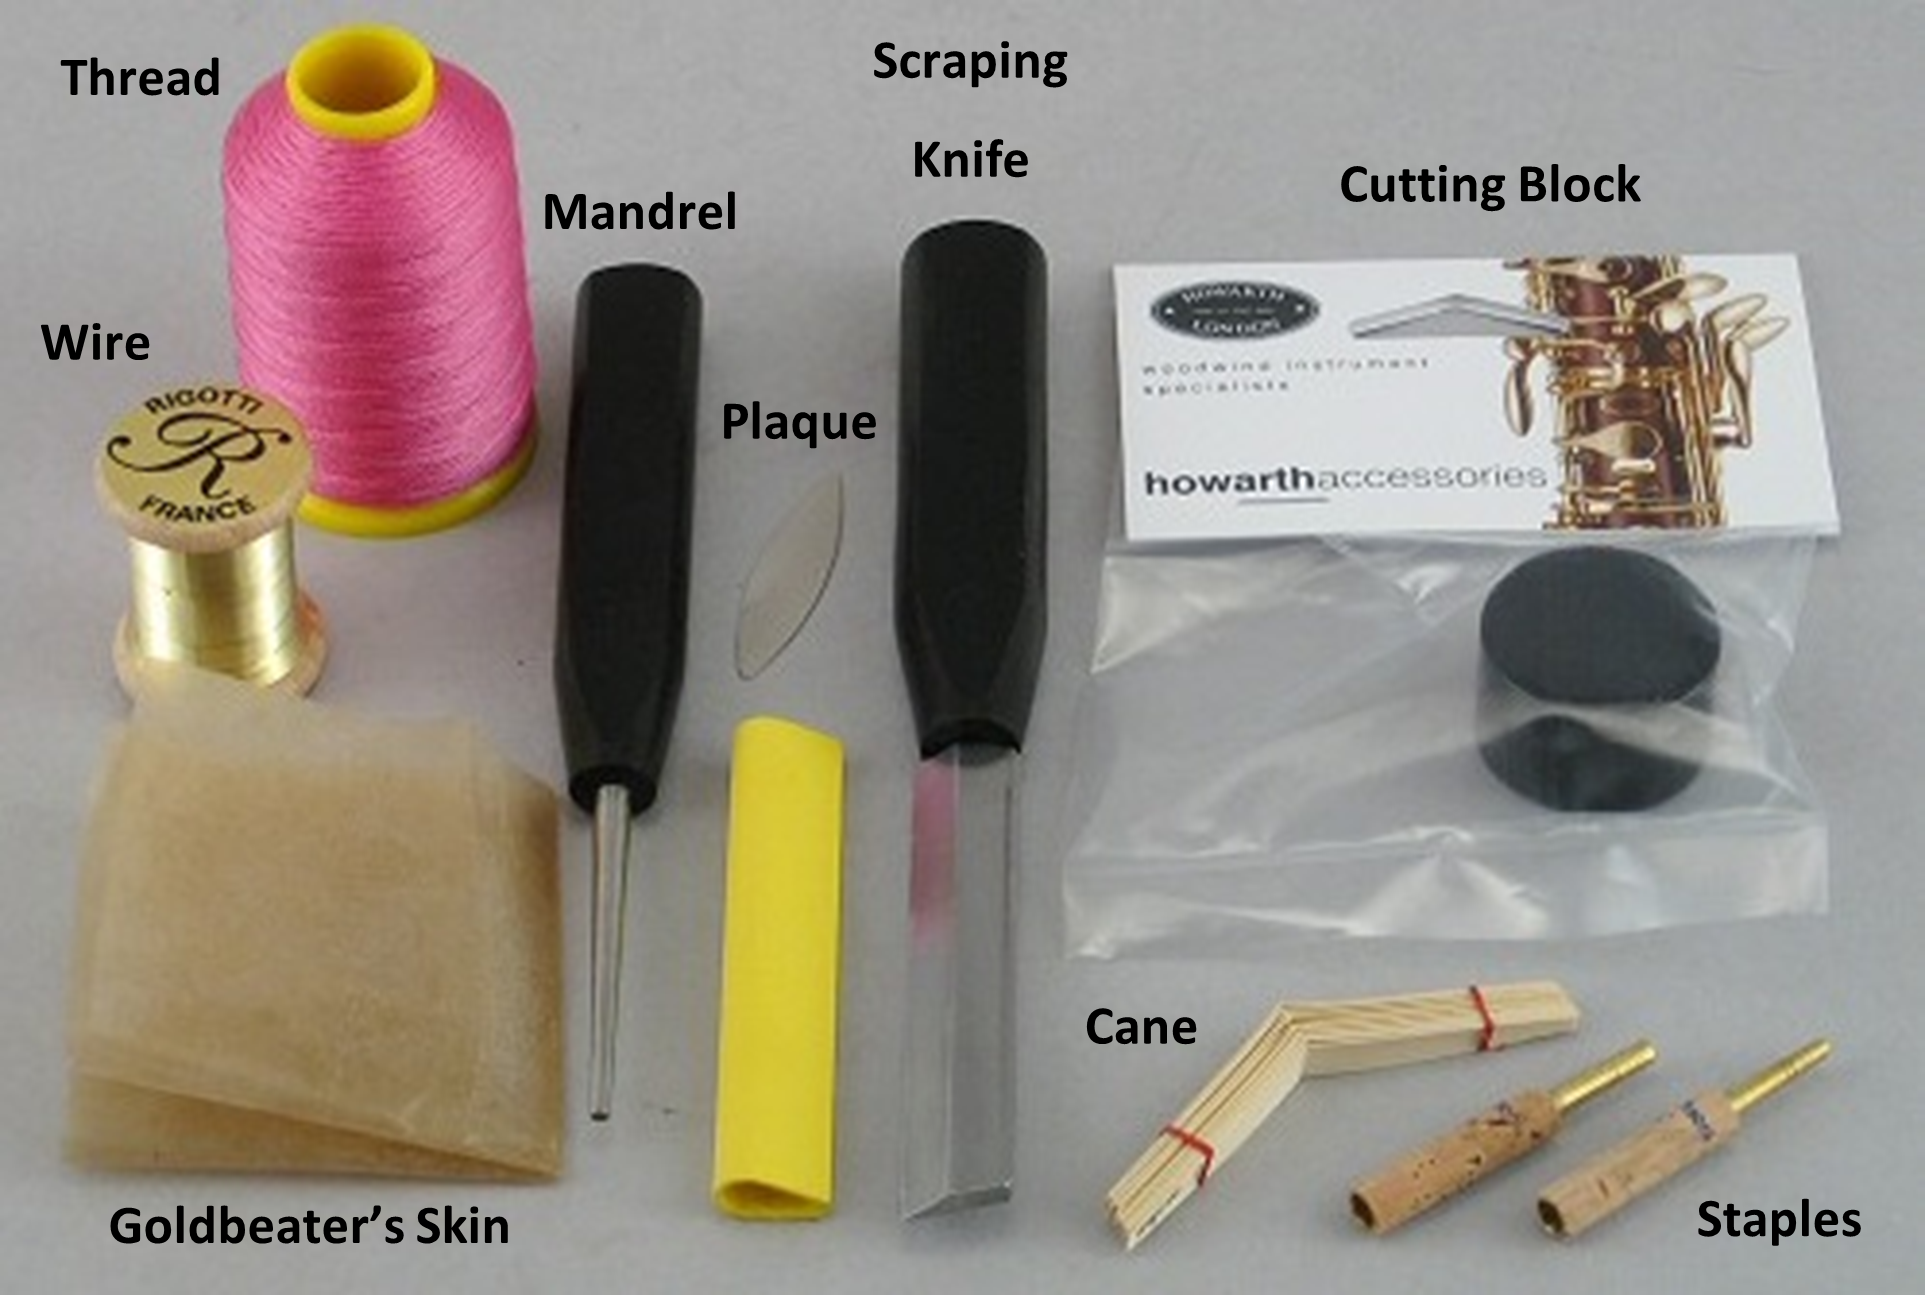
For those wanting to start making their own oboe reeds, the Howarth Oboe Reed Making Kit (£97.50) is ideal as it contains all the specialist items which are essential for reed making (see photo below). Purchasing the kit is more cost effective than buying the included items individually, and the equipment in the kit can be replaced or upgraded as your reed making progresses.
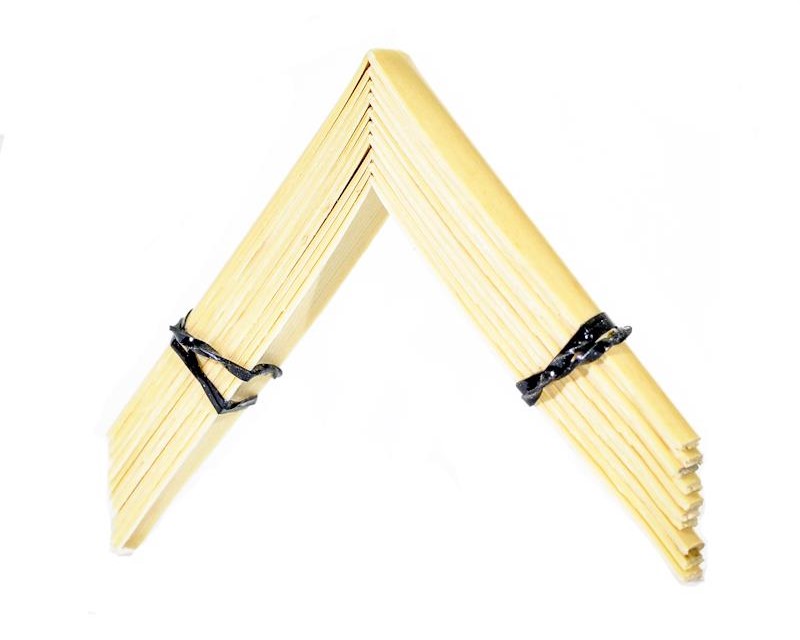
The earliest form cane can be purchased in from shops is in cylindrical tubes. These can then be split lengthways into three pieces using a cane splitter or knife. The pieces are then ready to be gouged, then shaped, processes which can both either be carried out by hand or machine. However, it is best to begin by establishing the basic elements of reed-making before learning to process your own cane.
Most people learn to make oboe reeds using cane which has already been gouged and shaped commercially. For those wanting to learn how to tie on a reed (attach the cane to the staple) accurately before learning scraping techniques, gouged, shaped, and profiled cane removes the scraping part of the reed making process. If you want to only practise the scraping process, reed blanks are available which are already bound.
Essential Reed Making Equipment
- Cane
There are many popular cane brands which better suit different players, so it can be beneficial to experiment by using different types of cane to make reeds when you’ve established a basic knowledge of reed making. It is recommended to begin by using cane which has already been gouged and shaped, and is of medium hardness and shape, such as Ke Xun Ge.
- Staples
Whilst particular staples suit different players and oboes better than others, it is best to use a standard type of oboe staple when beginning to make reeds, such as a Chiarugi brass 47mm no. 2 or 2+. You can then experiment when you are a more experienced reed maker and know what changes you are wanting to make.
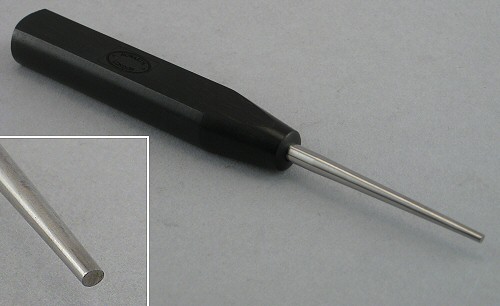
- Mandrel
Mandrels are used to insert into staples to ensure they keep their shape during the tying on process. There are mandrels to fit different sized staples, so you need to purchase a mandrel to match the size of the staple you most commonly use to make reeds.
- Thread
Thread is used to bind cane onto a staple to form a reed blank. Two popular brands of thread to tie on oboe reeds are Gutermann and La Soie. The Gutermann thread is 100% polyester, whereas the La Soie is nylon and a little thicker.

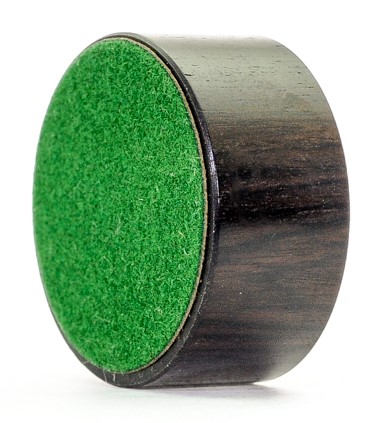
- Plaque
A plaque is used to insert between the blades of a reed to support them whilst being scraped. They can be made from wood, metal, or plastic, depending on the type of surface you’d like to scrape on. Darker coloured plaques provide a solid backing to the blades but neon plaques are harder to lose!
- Scraping knife
A specialist knife is essential for scraping the profile of an oboe reed. A good, reasonably priced knife for beginner reed makers is the Chiarugi bevel-edged knife, which has a tempered steel blade and hardwood handle. If you are willing to invest in a knife that will last well for many years, companies such as Graf, Gregson, and Reeds ‘n’ Stuff make such knives.
- Cutting block
These blocks are used as a hard, supportive surface when you are cutting the folded tip from the top of the reed blank to separate the two blades. They are usually made from a material such as blackwood with a convex face.
- Stanley knife (or similar)
A lightweight knife such as a Stanley knife is recommended for cutting the folded tip from the top of a reed blank and can also be used for other elements of the reed making process, e.g. cutting the thread after tying on. Using this second knife means your scraping knife will become blunt less quickly.


Optional Reed Making Equipment
- Wire
Many reed makers use thin wire to better control the opening between a reed’s blades, but others choose not to wire their reeds as they feel this limits the amount that the reed can vibrate.
- Pliers
If you choose to wire your reeds, or adjust the wire of existing reeds, pliers are needed so the ends of the wire can be twisted tightly to the reed.
- Goldbeater’s skin/Clingfilm
Most reed makers use goldbeater’s skin or clingfilm to make their reeds as airtight as possible, reducing the possibility of there being any gaps between the lines of thread where air is leaking out.
- Nail varnish
Clear nail varnish can be used to seal any small gaps in a reed’s binding. If you choose to apply nail varnish to a reed, try to avoid getting any varnish on the cane itself.
- Instructional guide
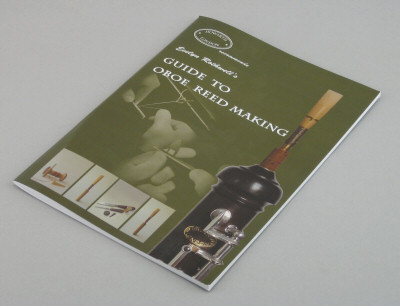
Reed making literature can be helpful to guide beginner reed makers. Evelyn Rothwell’s Guide to Oboe Reed Making remains a standard text on reed-making in the UK and contains helpful pictures of the different stages of the reed making process. Dr. Downing’s Making Oboe Reeds is Easy! is also a good basic guide.


When beginning to learn how to make oboe reeds, it is essential to gain a basic knowledge of the equipment needed. Purchasing the necessary items is an initial investment, but many of them can last for several years, and it is vital to obtain the specific tools designed for each process. Whilst oboe reed making is complicated and the first stages of learning can be frustrating, with perseverance you can learn to produce reeds which perfectly suit your requirements, a process which can be very rewarding.
For more information on reed making equipment, please contact us at [email protected] or 02079352407.
Bethany Craft- Oboe Specialist